A Curious Specimen
This floral enigma is bestowed a dual horned flame,
based within the receptacle of the flowering bloom.
With these flickering flame tips twisting in helical form,
reaching up and convening at the crown.
Each floret expresses an alluring appeal,
Captivating from a distance, Agonising on contact.
However, when engaged with in a manner
of pure Sincerity and Gratitude, the sensation that ensues
Transcends the past, Transcends the future,
Transcends all that ever was and all that ever will be.
Resulting in a Peaceful Content, that opens the eyes to Eternity,
anchoring them in this irresistible Timelessness…
That IS.
The Fire Blossom is the name given to the logo or symbol which represents A Beautiful Aching.
This post endeavours to outline its design and construction processes, exploring the methods and techniques that were utilised in creating the end result.
Design Constraints
The underlying principle for this design is, The Trinity or The Three.
The only driving dimension to constrain the entire design is to be the overall size. All other elements are to be sized and positioned through naturally derived geometric relationships and proportions.
These geometric associations should be on a direct first level basis wherever possible, although this is not always practical. In some instances, implied proportions and relationships from other areas of the design may be utilised, so as to not over complicate the geometry.
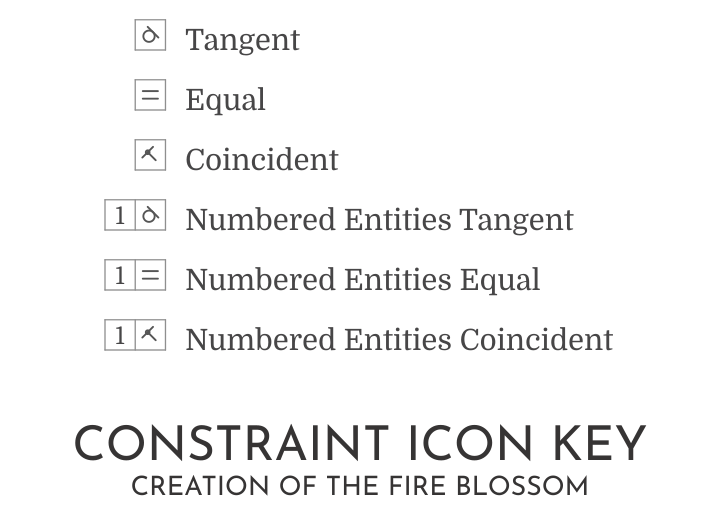
Below is a key of the symbols that will be used to identify the types of relationship constraints which appear on the associated diagrams.
Geometric Supremacy
Mathematics does not define Geometry.
Geometry defines Mathematics. 1
Geometry expresses temporal relationships between Singularity’s unique individual boundary states.
Mathematics defines and describes these Geometric relationships.
So Geometry encapsulates Mathematics.
Geometry is not a subset of Mathematics.
When using Mathematics, One is referencing Geometry in some way, shape or form.
Simply put, the tree comes first, the description of the tree follows.
Similarly, the spider does not need Mathematics to construct its web.
Mathematics, is the Language of Geometry.
A Simulation uses Mathematics
to Define a universe.
Reality is the Universe,
which Mathematics can then Define.
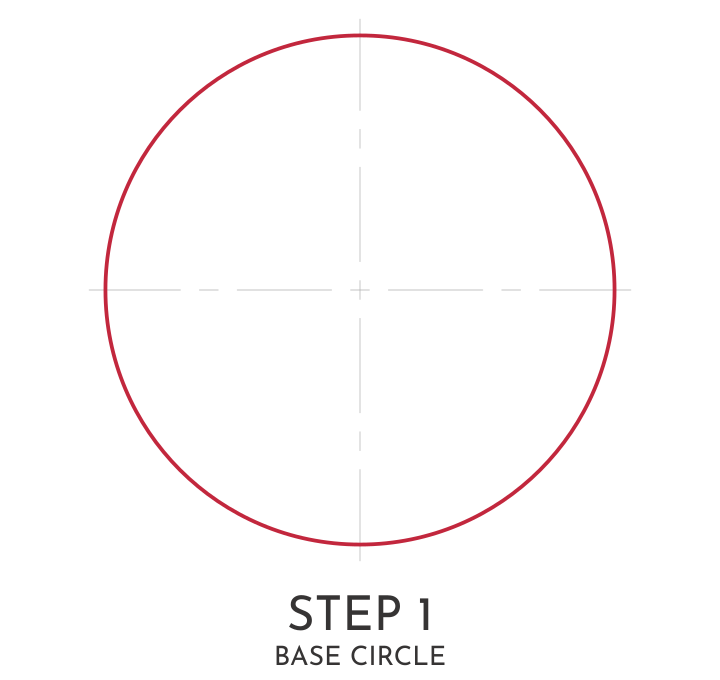
Step 1 – Base Circle
This is a fairly straight forward first step.
It is simply, a circle.
This circle establishes the overall size of the image and is the only feature to be given a predefined dimension. It does not matter what the actual dimension is, because all else will be proportioned to it.
All other features and proportions will be derived from structural geometric relationships as stated previously.
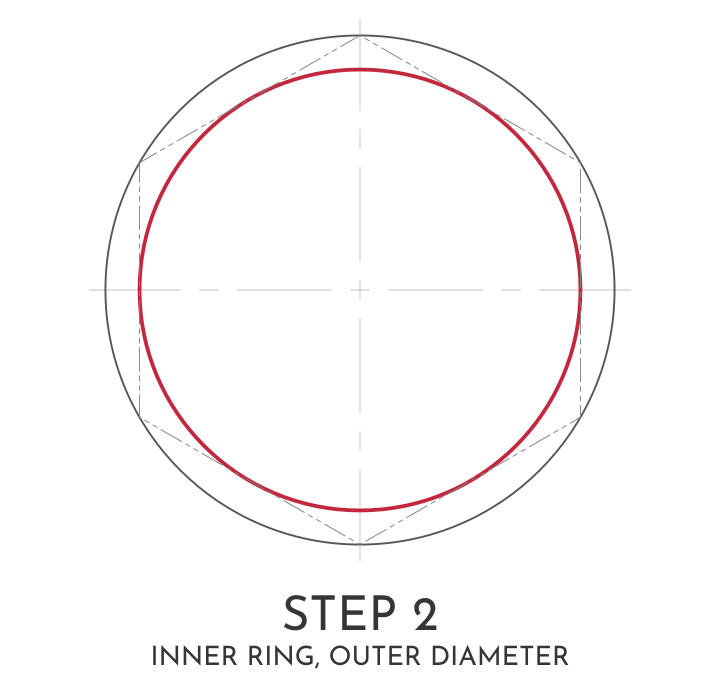
Step 2 – Inner Ring, Outer Diameter
This step gives an inscribed circle of a hexagon within the base circle.
The hexagon fits with The Trinity theme as six is a multiple of three.
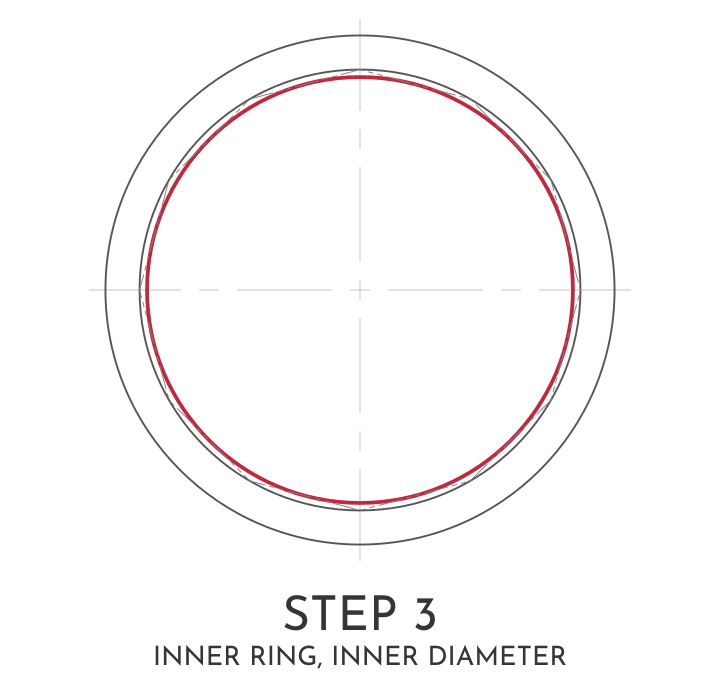
Step 3 – Inner Ring, Inner Diameter
Next, the inscribed circle of a twelve-sided polygon is specified within the previously define circle.
The twelve-sided polygon also fits with The Trinity theme given that twelve is again, a multiple of three.
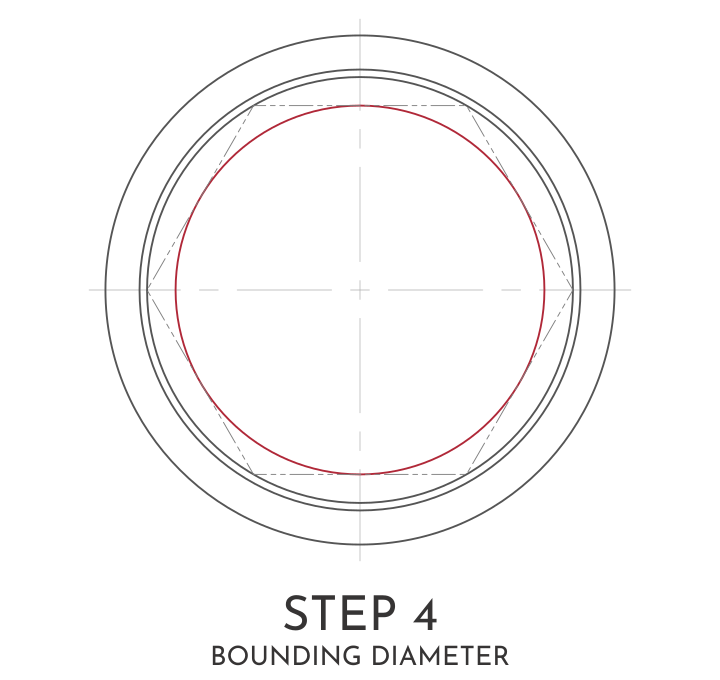
Step 4 – Bounding Diameter
Another inscribed circle is then generated from a hexagon within the inner ring.
This encloses the region where the main emblem is to be positioned.
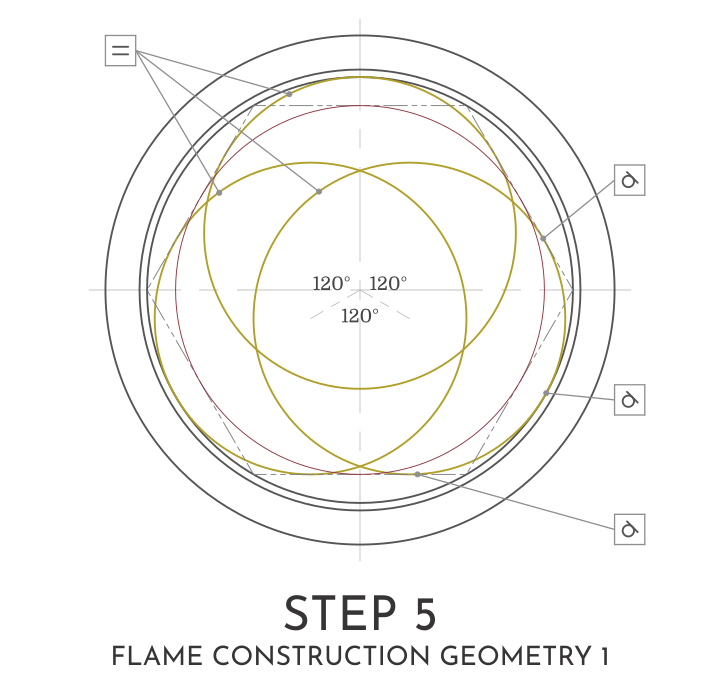
Step 5 – Flame Construction Geometry 1
Three circles of the same size, 120° apart are put in place.
The centre of the top circle is vertically coincident to the base centre.
The same tangent constraints apply to all circles.
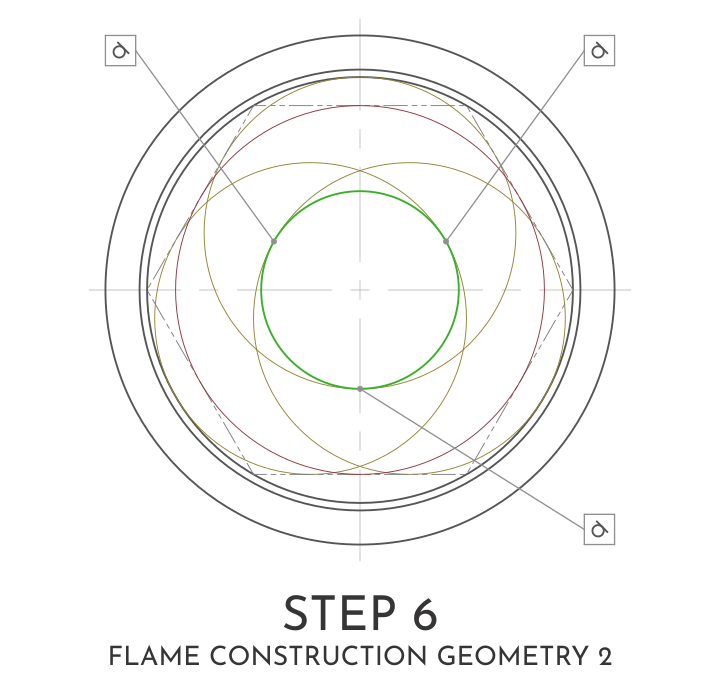
Step 6 – Flame Construction Geometry 2
The overlapping area of the three circles defines a central circle tangent to those three circles.
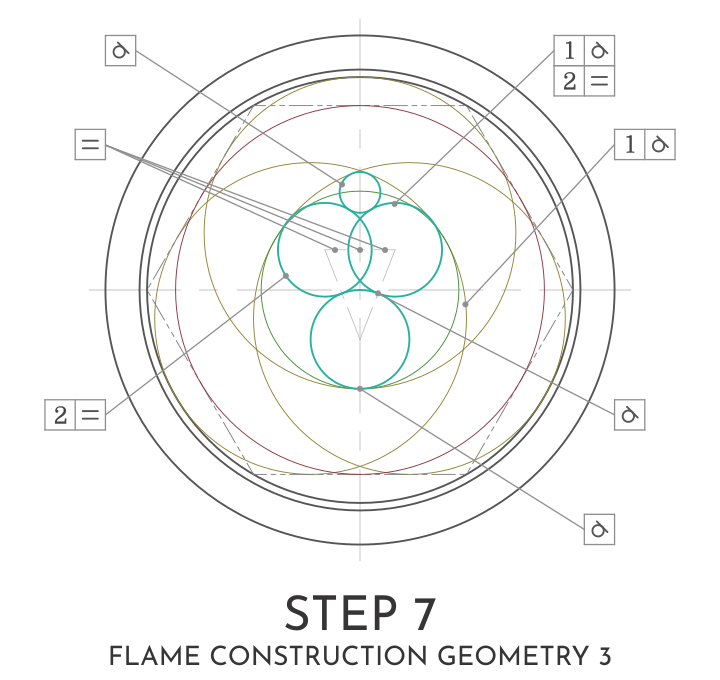
Step 7 – Flame Construction Geometry 3
A series of four circles is now draw, these will help delineate aspects of the flames.
Features and constraints are symmetrical about the vertical centre line.
The top smaller circle is tangent at four of its contact points.
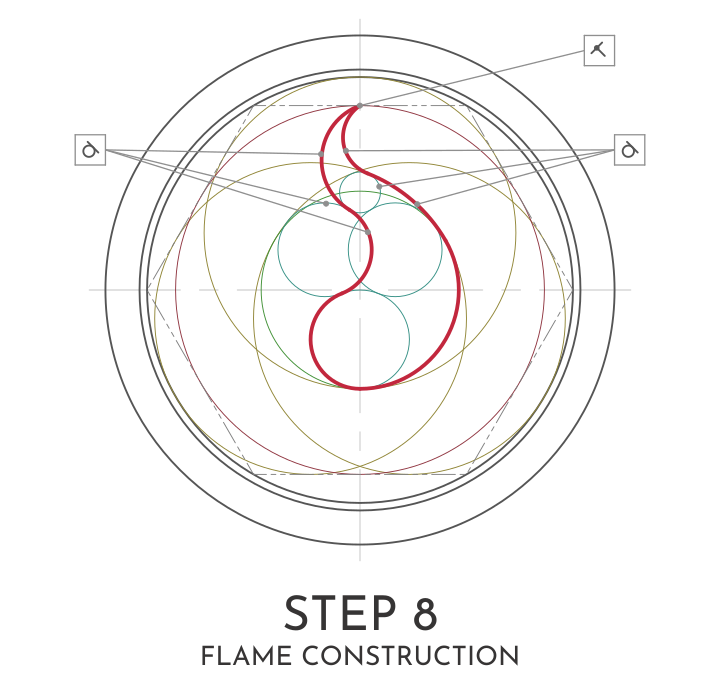
Step 8 – Flame Construction
The arcs that make up the first flame can now be outlined from all the previous geometry, as shown above.
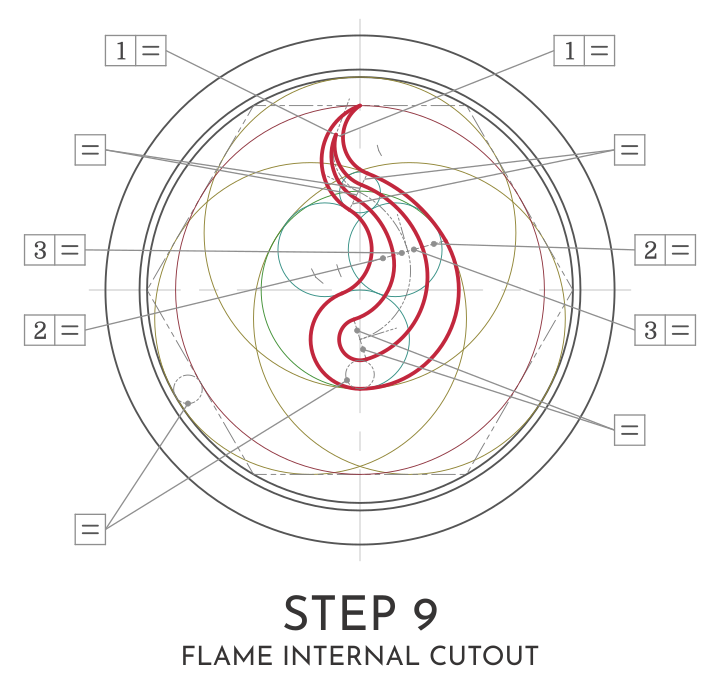
Step 9 – Flame Internal Cut-Out
The internal flame cut-out can now be made.
The full constraints on this diagram are not included, as this would present too much complexity for the purposes of this post.
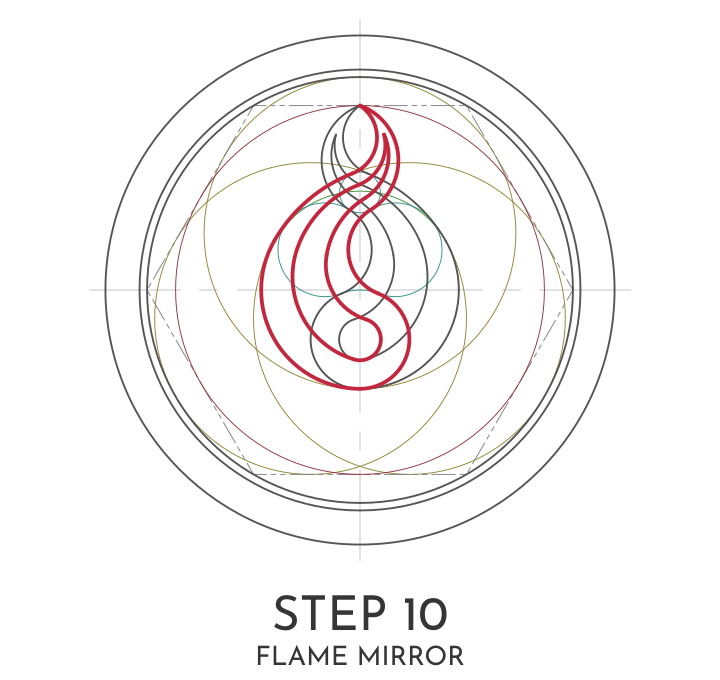
Step 10 – Flame Mirror
All the flame geometry is then mirrored to create the second flame motif.
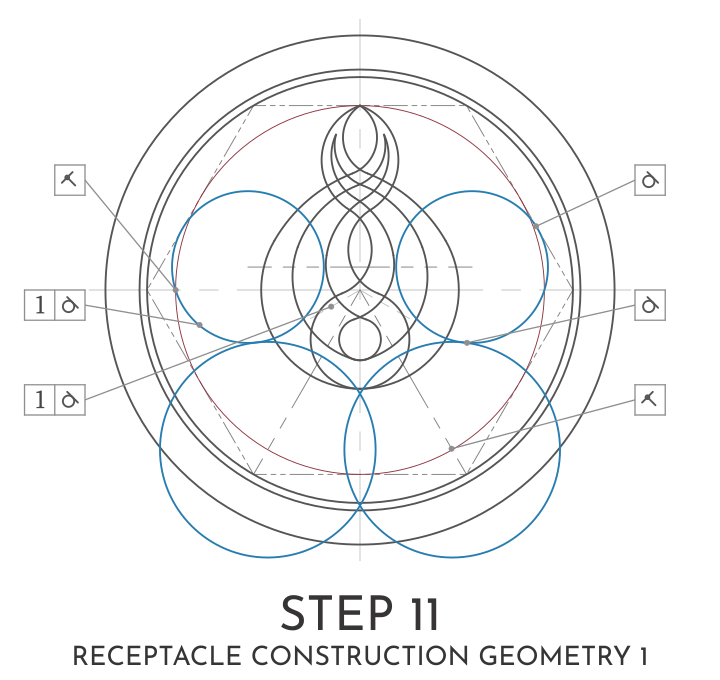
Step 11 – Receptacle Construction Geometry 1
Four circles are drawn to set the foundation for the receptacle.
Features and constraints are symmetrical about the vertical centre line.
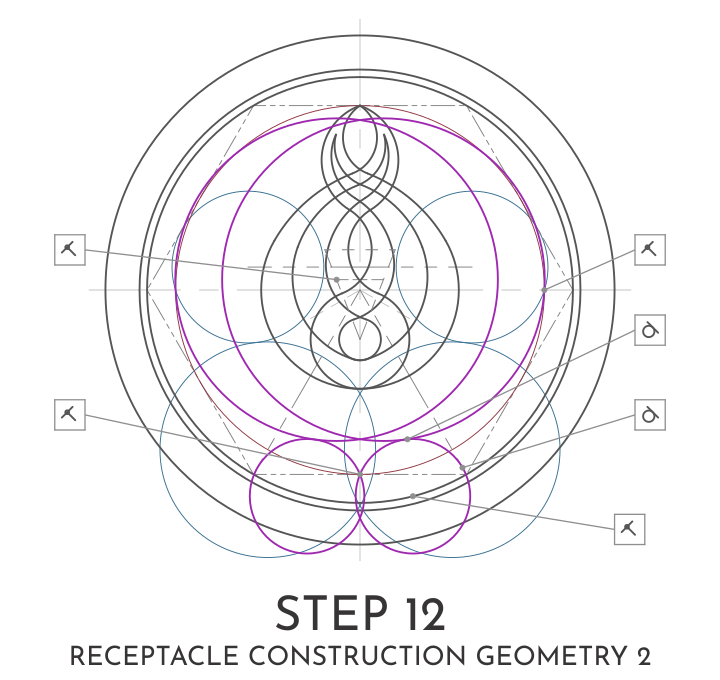
Step 12 – Receptacle Construction Geometry 2
Another four circles complete the setup for the receptacle.
Features and constraints are symmetrical about the vertical centre line.
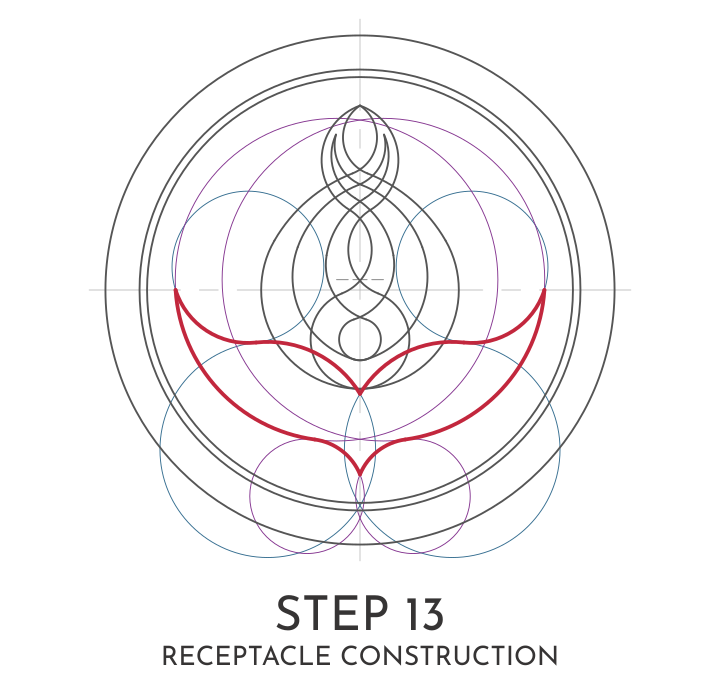
Step 13 – Receptacle Construction
The outline of the receptacle is generated from the receptacle setup geometry.
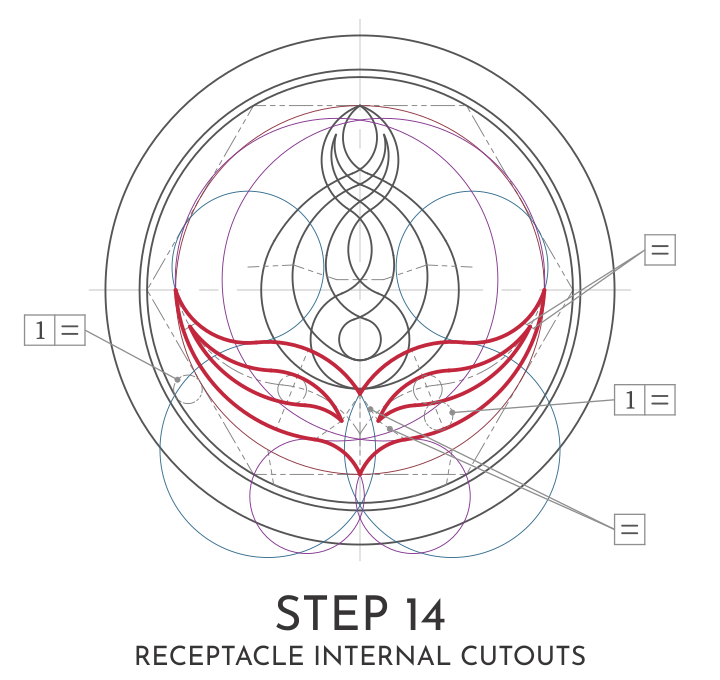
Step 14 – Receptacle Internal Cut-Outs
Internal receptacle cut-outs are drawn next.
The full constraints on this diagram are not included, as this would present too much complexity for the purposes of this post.
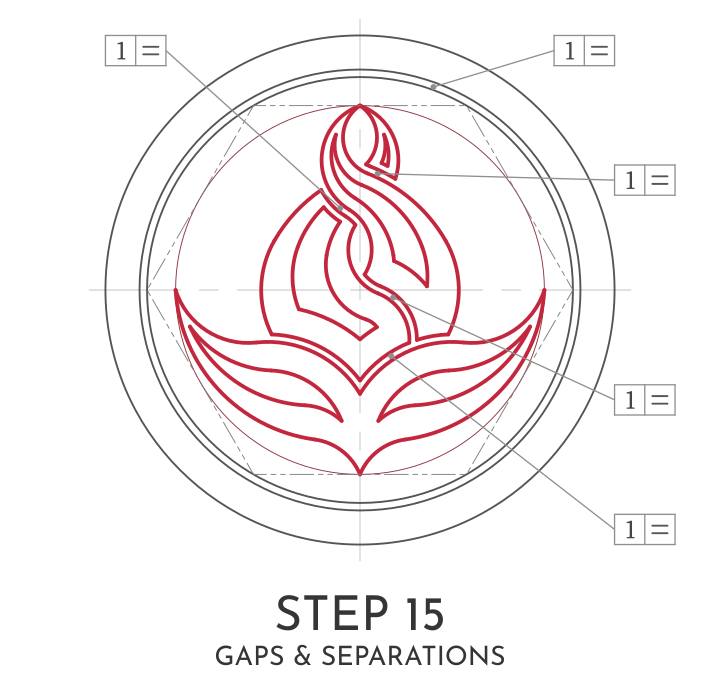
Step 15 – Gaps And Separations
Gaps in the required areas are now created, with these all being the same width as the inner ring.
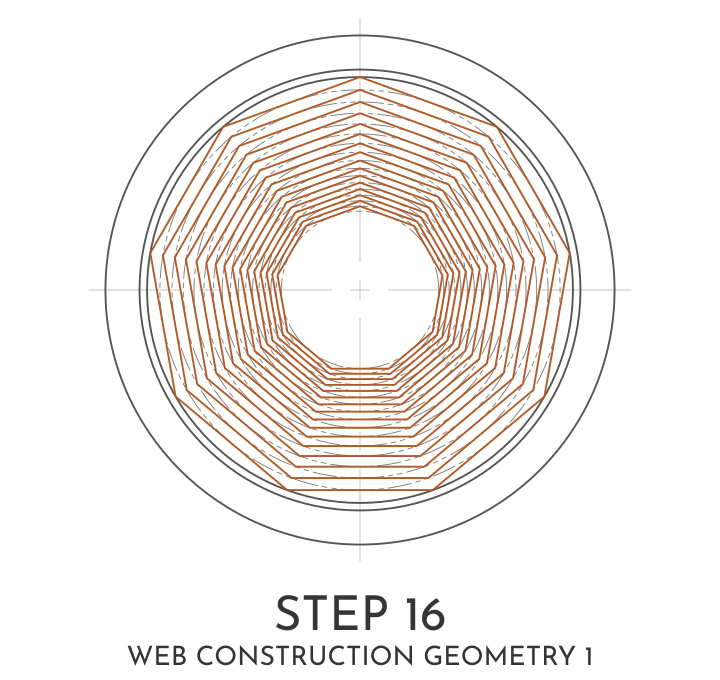
Step 16 – Web Construction Geometry 1
Web construction begins by setting up a symmetric convergence of a nine-sided regular polygon. Nine is again a factor or three.
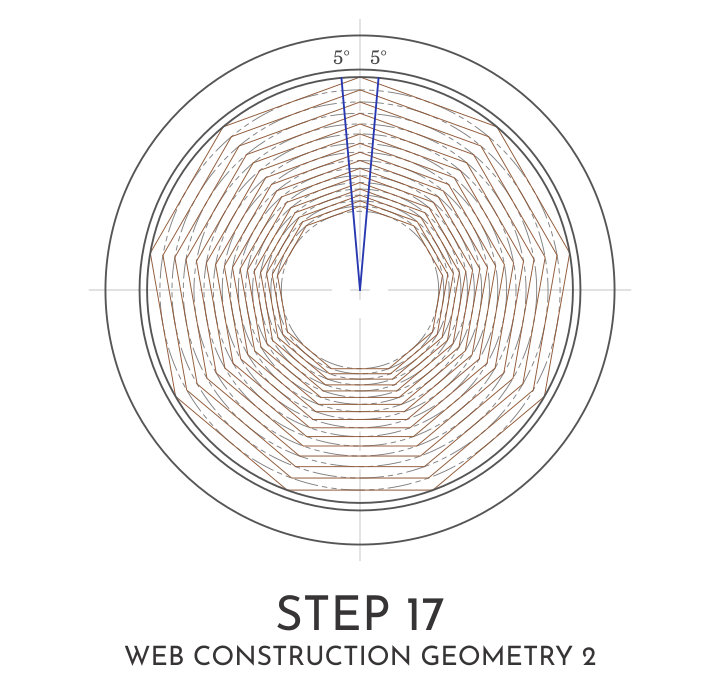
Step 17 – Web Construction Geometry 2
Two straight lines are then drawn from the centre out to the inner ring and each are 5° from the vertical.
Step 18 – Web Construction Geometry 3
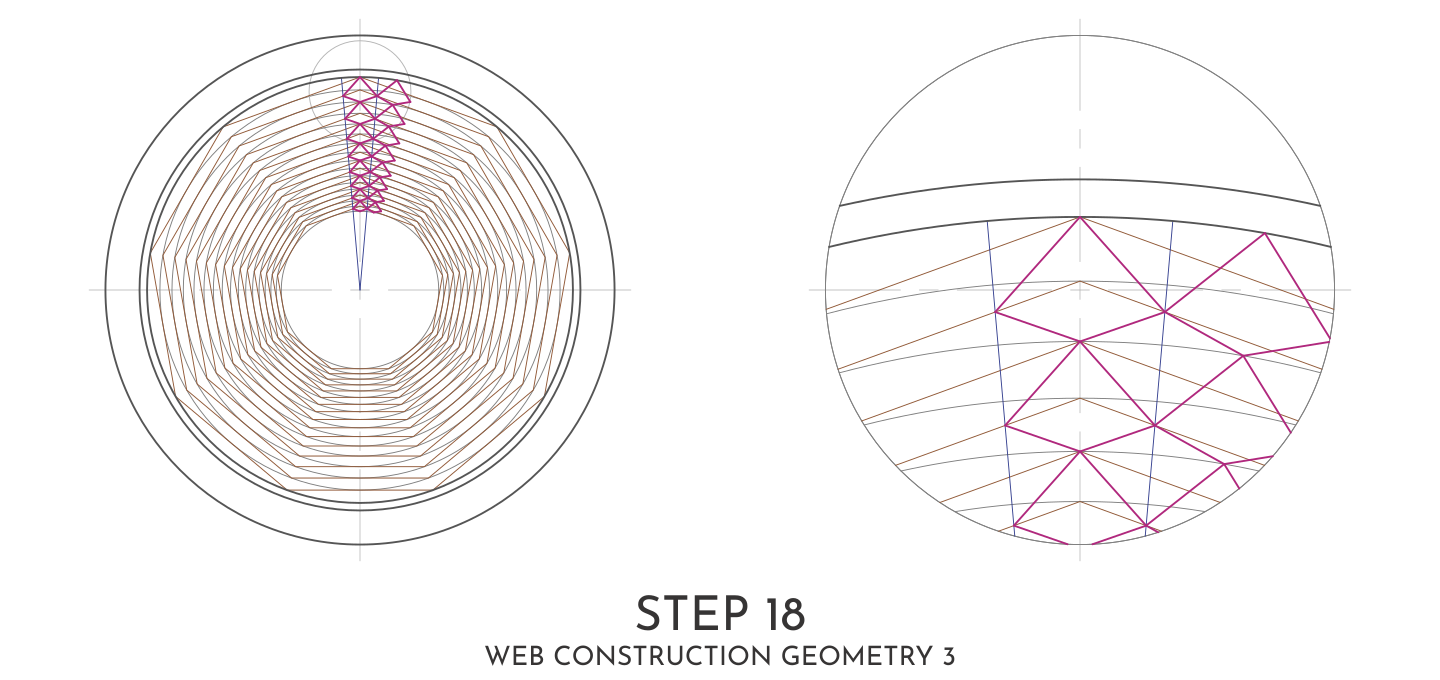
An inverted diamond shape is constructed down the convergent polygon pattern and then mirrored about one of the lines extending from the centre.
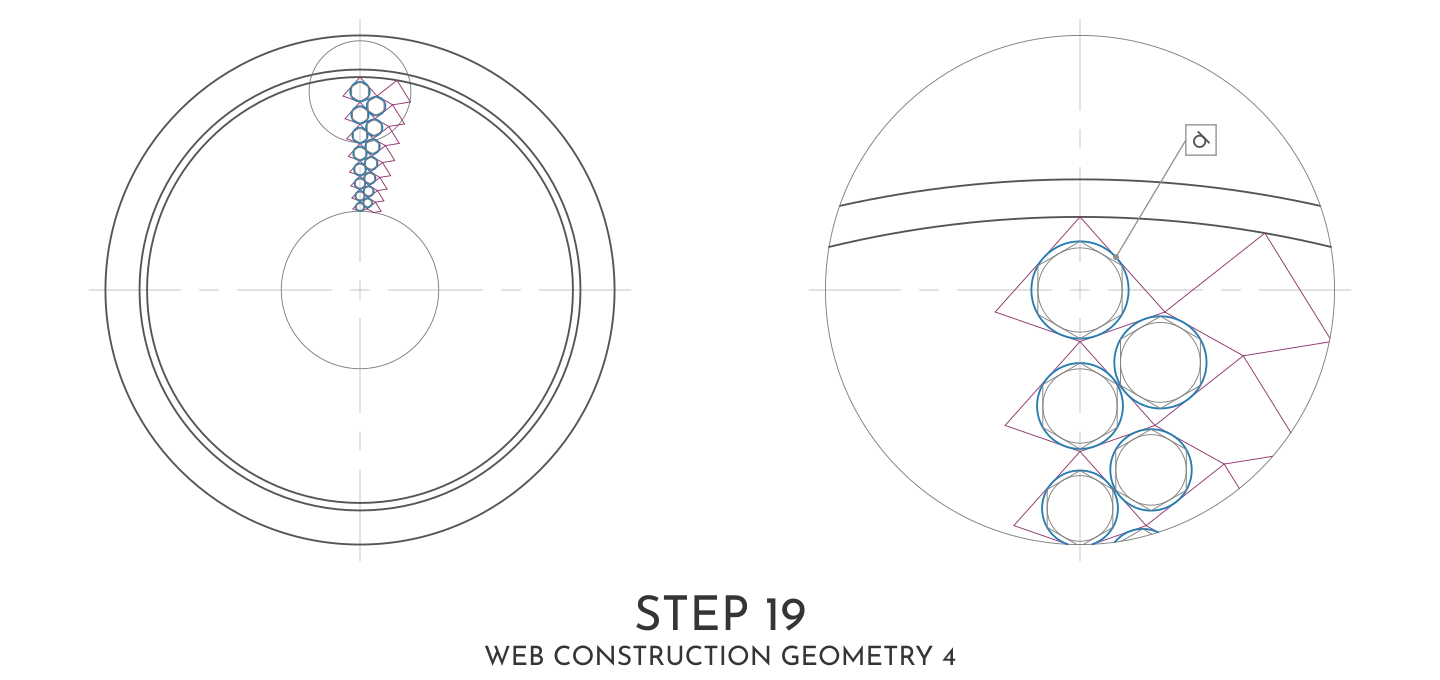
Step 19 – Web Construction Geometry 4
Within this inverted diamond shape, a circle is established by its tangencies to the sides of the inverted diamond. This becomes a circumscribed circle for a hexagon, which then implies its next inscribed circle.
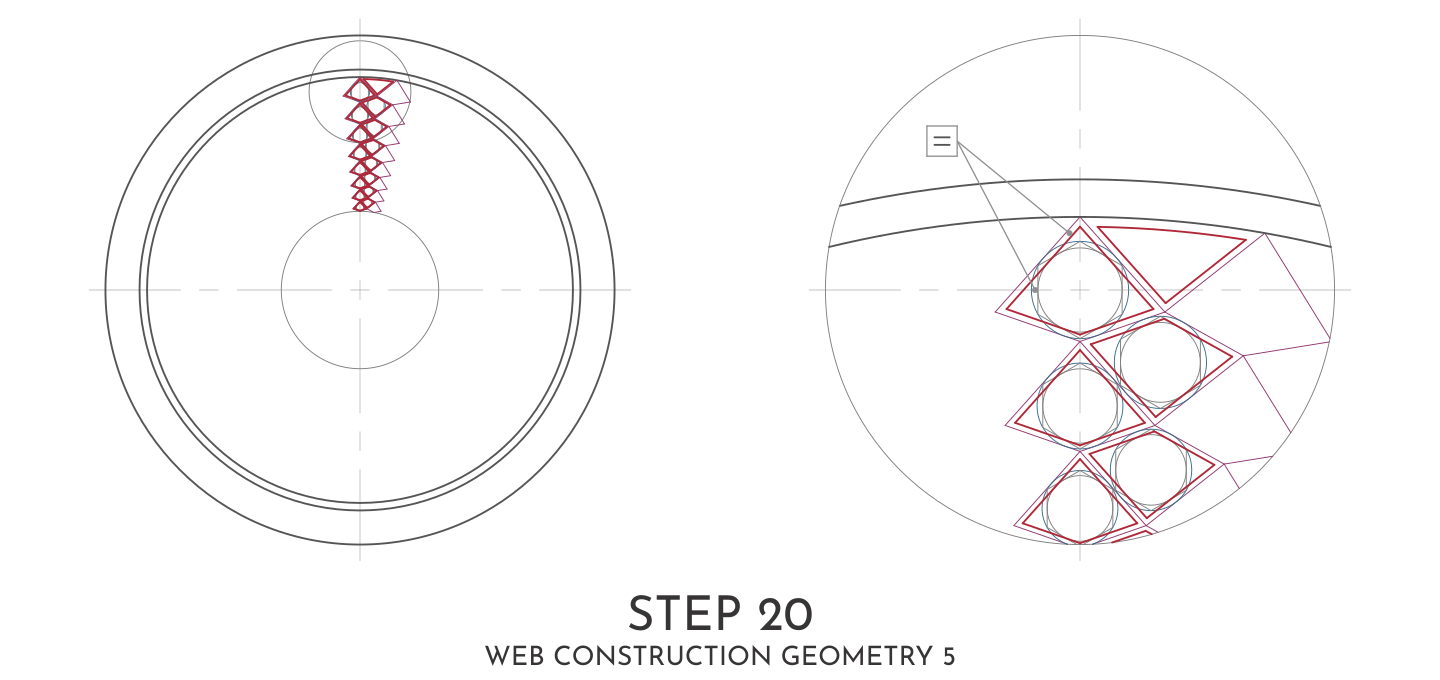
Step 20 – Web Construction Geometry 5
The lines of the inverted diamond shape are then offset inward by the distance between the circumscribe circle and the inscribe circle of the hexagon.
These become the geometric basis for the web.
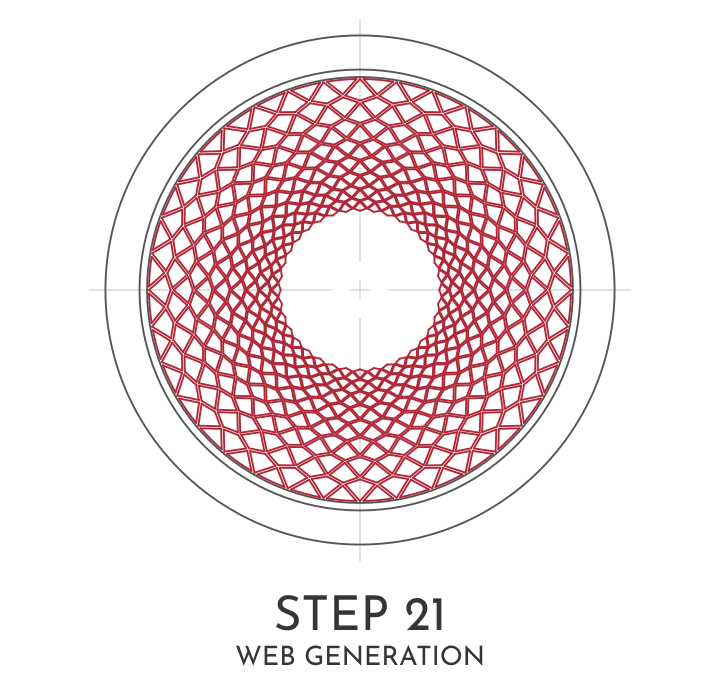
Step 21 – Web Generation
This initial web geometry is then arrayed around the centre thirty-six times to create the web background.
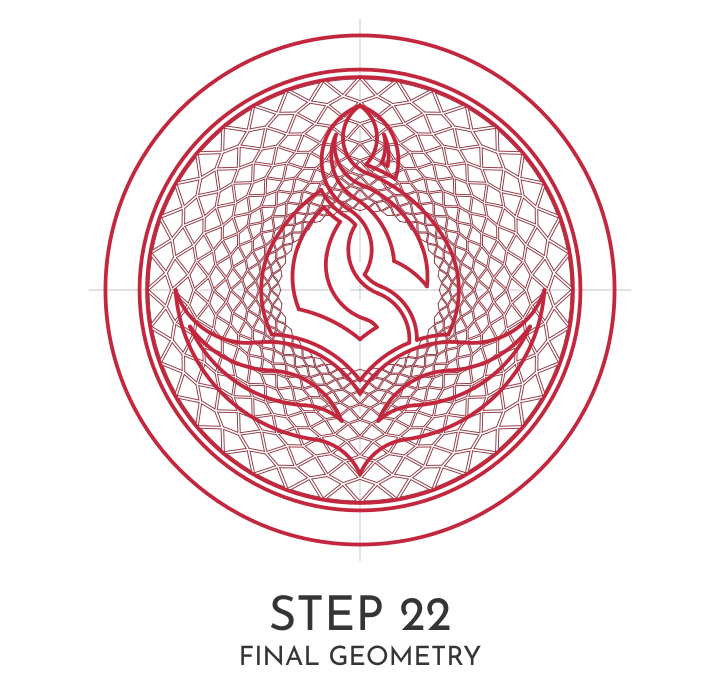
Step 22 – Final Geometry
Displaying all the elements gives the full geometry for the Fire Blossom image.
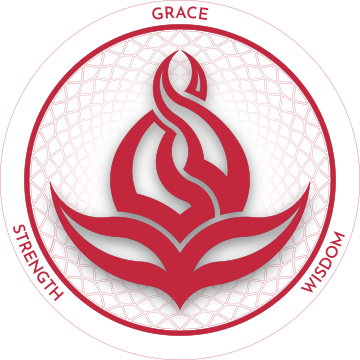
Step 23 – The Fire Blossom
Filling in colour, adding additional text and effects, gives the Fire Blossom its resultant form.
To those that feel Hurt, Angered or Offended
by anything presented on A Beautiful Aching…
Do you not Understand
what A Curious Specimen
the Fire Blossom is?
Revision Log
- 25th Apr. 2025 – Quotation added to Geometric Supremacy section.
